
Introduction-Configure a Gamepad for Retro Games
Modern controllers, classic fun. Retro gaming is having a massive comeback—from pixel-perfect NES adventures to 16-bit SNES masterpieces. But before you relive your favorite arcade gems, you need one crucial thing: getting your gamepad configured and tested properly.
In this comprehensive guide, we’ll walk you through everything you need to know—from choosing the right controller, connecting and calibrating it, to testing it online using free web tools. By the end, your setup will feel so seamless you’ll swear you’re back in the ’90s.
Table of Contents
Why Configure Your Gamepad for Retro Games?
Retro gaming thrives on precision and nostalgia. That one missed input in Super Mario Bros. or distorted joystick movement in Street Fighter II can ruin the magic.
Proper configuration ensures:
- Accurate button mapping (A = A, not random jump + pause combo)
- Calibrated joystick movement (no drift or dead zones)
- Seamless emulator compatibility (RetroArch, MAME, Dolphin, etc.)
- Comfortable, responsive gameplay
Think of this setup process like polishing your vintage car—it’s about making it run as smoothly as it looks.
Related Post: How to Use a Gamepad Tester with Cloud Gaming Platforms
Understanding How Gamepads Communicate with Your PC

Before you start button testing or emulator tweaking, it helps to know what’s happening under the hood.
- USB Controllers: Plug-and-play devices that rely on basic drivers.
- Bluetooth Controllers: Require pairing and often custom drivers.
- HTML5 Gamepad API: Recognizes your controller inputs in browsers; used by online gamepad testers and web-based games.
Your computer interprets every button press as a unique input signal. Testing tools visualize these inputs so you can confirm that everything’s being detected.
READ OUR ARTICLE ON: BROWSER CONTROLLER COMPETIBILITY
Step 1: Choose the Right Controller for Retro Gaming
Different eras, different feels. But thankfully, modern technology lets you emulate classic experiences.
Popular options:
- Xbox Series / Xbox One Controller – Great for plug-and-play compatibility on Windows.
- PlayStation DualShock / DualSense – Excellent D-pad and analog precision for RPGs and fighters.
- 8BitDo SN30 Pro – A fan-favorite for retro gamers. Retro look, modern connectivity.
- Wired USB Retro Gamepads – Budget-friendly and designed specifically for emulators.
What to look for:
- Low input latency (Bluetooth 5.0 or wired)
- Comfortable ergonomics
- Reliable D-pad and responsive buttons
Remember: a retro gamepad’s charm often lies in its simplicity—sometimes fewer buttons equal more satisfying playtime.
Step 2: Connect the Gamepad Properly
Time to plug in (or pair up). Here’s how to make sure your system recognizes your controller.
For Wired USB Controllers:
- Plug into a working USB port.
- Wait for your system to auto-install drivers.
- Confirm connection under Devices and Printers → Game Controller Settings in Windows.
For Bluetooth Controllers:
- Press and hold the pairing button (check your model’s guide).
- Enable Bluetooth on your PC, then Add Device > Bluetooth.
- Select your controller and wait for pairing confirmation.
💡 Pro tip: Always connect to the same USB port or Bluetooth profile to avoid remapping issues later.
Step 3: Test Your Gamepad Online
Before diving into calibration, test your inputs with a free online controller tester. This confirms that all buttons and joysticks send registered signals.
Recommended Online Testing Tools:
These sites use the HTML5 Gamepad API to detect:
- Button presses and releases
- Joystick movement and range
- Trigger sensitivity
- Input latency
How to Use an Online Controller Tester:
- Visit the site in Chrome or Edge (supports gamepad API).
- Plug or connect your controller.
- Move sticks, press buttons, and pull triggers.
- Observe the on-screen feedback.
If a button doesn’t respond or a joystick drifts on its own, you’ve identified an issue before firing up an emulator—saving you a lot of confusion later.
Step 4: Calibrate and Configure Your Controller
Now that you know inputs work, let’s get precision dialed in.
Calibrating via Windows:
- Open Control Panel → Devices and Printers.
- Right-click your controller → Game Controller Settings → Properties.
- Go to the Settings tab → Calibrate.
- Follow the instructions to center joysticks and set minimum/maximum inputs.
This ensures no more unwanted drift or misaligned movement.
Adjusting Dead Zones:
- Dead zone is the range where the joystick can move slightly without registering input.
- If too small: your character drifts.
- If too large: movements feel unresponsive.
- Optimal dead zone range: 5–10%.
Most emulators, like RetroArch, offer custom dead zone settings within Input Options.
Step 5: Map Buttons for Retro Emulators
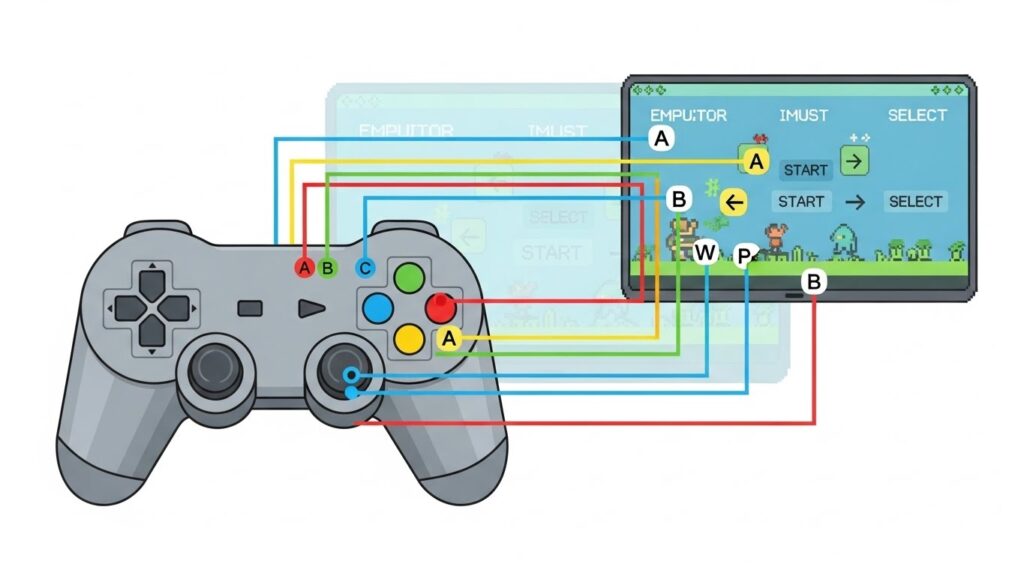
Every emulator handles input a little differently, but the mapping process follows a universal logic.
In RetroArch:
- Go to Settings → Input → Port 1 Binds.
- Select each button and press the corresponding one on your controller.
- Save the configuration.
In MAME:
- Press Tab in-game.
- Choose Input (This Game) to create per-game mappings.
- Press Enter on a function, then press the desired button.
Emulator shorthand examples:
- A/B buttons = main action/jump/fire
- D-pad = navigation
- L/R triggers = secondary functions
- Start/Select = menu and pause
Pro tip: Save multiple profiles for different controller types—it’s a lifesaver when switching between devices.
Troubleshooting Common Gamepad Issues
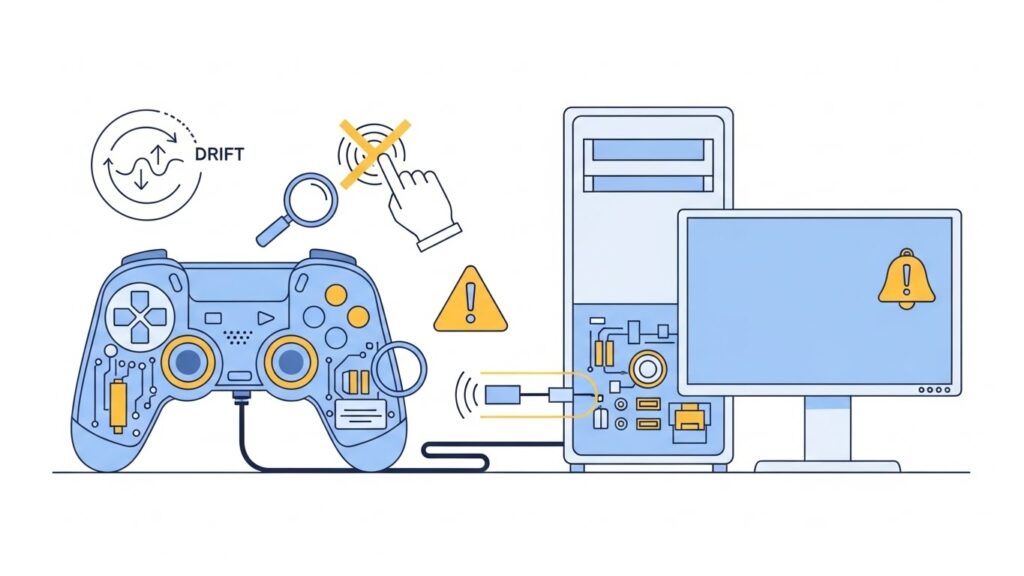
Even the most careful setup can hit a snag. Here’s how to diagnose and fix typical controller problems.
| Issue | Possible Cause | Fix |
|---|---|---|
| Buttons not responding | Driver glitch | Unplug, reconnect, reinstall drivers |
| Joystick drift | Misalignment or wear | Recalibrate or adjust dead zone |
| Input lag (delay) | Bluetooth interference | Use wired connection or move closer |
| Duplicate input in emulator | Double device detection | Disable unused input devices in emulator |
| Not detected online | Browser blocking input | Refresh page, check HTTPS, or use another browser |
For persistent issues, consider updating controller firmware (e.g., Xbox and 8BitDo updates via companion apps).
Online Testing Tools & External Resources
Online Gamepad Testing Tools:
Driver & Firmware Utilities:
Want to See More Gamepadscan’s Guide [CLICK THIS]
FAQs
How can I test my gamepad online for free?
Use an HTML5-based online tester like gamepad-tester.com. It instantly shows live input data from your controller without needing software.
Why is my joystick drifting during retro games?
This is often caused by poor calibration or a low dead zone setting. Recalibrate in Windows or your emulator’s input menu.
Can I configure multiple controllers for local multiplayer?
Yes! Most emulators like RetroArch and MAME allow configuration for up to 4 controllers simultaneously under Input Port settings.
My controller works in Windows but not in my emulator—why?
Some emulators require manual mapping or don’t recognize DirectInput controllers. Switch to XInput mode using tools like x360ce.
Is a wired controller better for retro games?
Wired gamepads generally have lower input latency, making them ideal for precision-based retro titles such as platformers and fighting games.
Conclusion and Key Takeaways
Configuring a gamepad for retro gaming may sound technical, but it’s an incredibly satisfying process once complete. You’ll eliminate lag, fix drift, and rediscover those crisp, nostalgic inputs exactly as you remember them.
In summary:
- Connect your controller (wired or wireless).
- Test it online using an HTML5-based gamepad tester.
- Calibrate for precision in Windows or your emulator.
- Map buttons properly within emulator settings.
- Troubleshoot any issues early for smooth play.
Proper setup turns your controller into a time machine—taking you straight back to your favorite pixelated adventures, this time perfectly tuned and ready for action.