
Introduction-Common Gamepad Hardware Faults
Think of a gamepad tester as an X-ray machine for your controller. While you can feel that a button is ‘sticky’ or a stick is ‘loose’ while playing, you can’t see the electrical reality behind the plastic shell. Most gamers wait until a controller is completely unusable before they consider a repair, but by then, the damage is often permanent. In this guide, I’m going to show you how to use GamepadScan to spot the ‘invisible’ warning signs of hardware fatigue—from micro-switch failure to potentiometer wear—before they ruin your next gaming session.
Here’s the good news: Most gamepad problems can be diagnosed quickly using a simple online controller tester. Whether you’re dealing with Xbox controller drift, PlayStation button failures, or mysterious connectivity issues, this guide will show you exactly how to identify and understand common hardware faults before deciding whether to repair or replace your controller.
Related Post: XInput vs DirectInput Explained: Understanding Gamepad Input APIs (2026 Expert Guide)
Table of Contents
Why Use a Gamepad Tester for Hardware Diagnosis
A gamepad tester is your first line of defense against controller problems. These diagnostic tools, whether hardware-based or online HTML5 gamepad testers, provide real-time feedback about your controller’s performance.
Think of it as a health check-up for your gaming peripheral. Just like you wouldn’t guess what’s wrong with your car without running diagnostics, you shouldn’t assume your controller issues without proper testing.
Benefits of Using Controller Testing Tools
- Instant visual feedback on all inputs
- Precise measurements of analog stick positions
- Dead zone detection and calibration data
- Button response time analysis
- No software installation required (for online testers)
Most modern browsers support the HTML5 Gamepad API, making online controller testing accessible to everyone. You simply connect your controller via USB or Bluetooth and start diagnosing immediately.
Joystick and Analog Stick Problems

ABOVE FIGURE SHOWS INTERFACE OF OUR TESTER FOR JOYSTICK
Stick Drift: The Most Common Enemy
Stick drift is arguably the most prevalent hardware fault in modern controllers. It occurs when your analog stick registers movement without any physical input from you.
Using a joystick calibration tool, you can easily spot drift by observing the stick position values. A healthy analog stick should show:
- Center position: X=0, Y=0 (or very close)
- Smooth movement from -1 to +1 on both axes
- Stable readings when released
Types of Drift You Can Detect
Minor Drift (0.1-0.2 deviation)
Small movements that might not affect casual gaming but become noticeable in precision games like first-person shooters.
Major Drift (0.3+ deviation)
Significant unwanted movement that makes gaming nearly impossible. Characters walk on their own, cameras spin uncontrollably.
Intermittent Drift
The stick occasionally jumps to random positions. This often indicates loose connections or worn potentiometers.
Dead Zone Issues
Dead zones are areas where stick movement doesn’t register. A gamepad dead zone test reveals:
- Center dead zone: No response near the neutral position
- Outer dead zone: Maximum values aren’t reached
- Asymmetric dead zones: Different response on different sides
Professional controller diagnostic software can map these zones precisely, helping you understand whether the issue is hardware degradation or software calibration.
Sticky or Resistant Movement
Sometimes analog sticks become physically sticky or resistant. A tester helps differentiate between:
- Mechanical resistance (requiring cleaning)
- Electronic failures (needing component replacement)
- Calibration issues (fixable through software)
If you’ve been following the hardware discussions on r/Controller or YouTube channels like Gamer’s Nexus, you know that 2025 and 2026 have been the years of the ‘Hall Effect’ revolution. The gaming community is moving away from traditional ALPS potentiometers (which use physical friction and eventually fail) toward magnetic sensors that never touch. However, even these high-tech sticks can have ‘centering’ issues if the magnets aren’t calibrated correctly. I’ve seen many users on Discord complaining that their brand-new ‘un-driftable’ controllers actually show a jittery 0.02 center on our tester. This proves that no matter how good the tech is, you still need a raw data readout to verify the factory calibration.
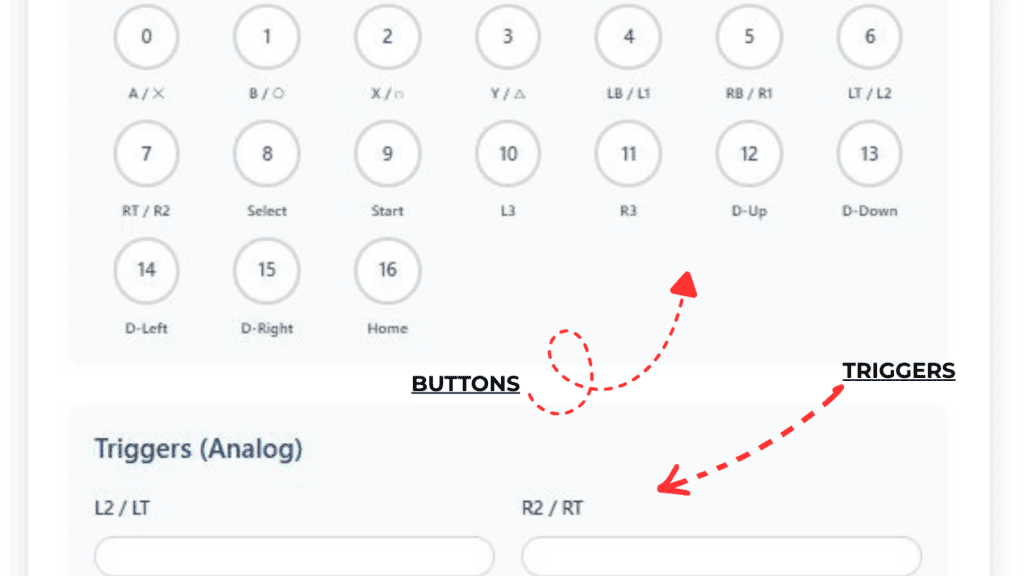
ABOVE FIGURE SHOWS OUR TOOL INTERFACE FOR BUTTON/TRIGGERS TESTING
Button-Related Hardware Faults
Unresponsive Buttons
Dead buttons are frustrating and often terminal for a controller’s lifespan. A button response tester shows:
Complete Failure
The button never registers, indicating:
- Broken membrane contacts
- Severed ribbon cables
- Damaged PCB traces
Intermittent Response
Buttons work occasionally, suggesting:
- Dirty contacts needing cleaning
- Worn conductive pads
- Loose internal connections
Ghost Inputs and Double-Clicking
Ghost inputs occur when buttons register without being pressed. This PlayStation button check or Xbox controller test reveals:
- Constant ghost presses: Short circuits or liquid damage
- Random ghost inputs: Electromagnetic interference or failing components
- Double inputs: Worn switches registering multiple clicks
Response Time Degradation
Modern gamepad testing tools measure button response latency. Increased delay indicates:
- Worn mechanical switches
- Oxidized contacts
- Controller firmware issues
Trigger and Shoulder Button Issues

Analog Trigger Problems
Triggers (L2/R2, LT/RT) are analog inputs with unique failure modes:
Incomplete Range of Motion
A trigger sensitivity test shows whether triggers reach their full 0-255 value range. Common issues include:
- Stuck at 50%: Physical obstruction or broken spring
- Maximum at 80%: Worn potentiometer
- Jumpy values: Dirty or damaged sensor
Hair Trigger Syndrome
Some triggers become overly sensitive, registering full press with minimal pressure. Controller input lag testing reveals:
- Instant 0-to-max jumps
- Missing intermediate values
- Inconsistent activation points
Digital Shoulder Buttons
L1/R1 (LB/RB) problems are similar to face buttons but with unique challenges:
- Click but no register: Broken tactile switch
- Mushy feel with registration: Worn rubber membrane
- Stuck in pressed state: Physical damage or debris
💡 Developer’s Pro Tip: The Trigger Deadzone Trap “Most people only test their joysticks, but the L2/R2 (LT/RT) triggers are actually the most common source of ‘ghost’ lag. These triggers use a small rubber pad that compresses over time. If you use our tester and notice that your trigger only hits ‘1.00’ (100% pressed) when you mash it with extreme force, your rubber contact is likely worn thin. My recommendation? Don’t buy a new controller yet. Many modern games have a ‘Trigger Deadzone’ setting. If our tool shows your trigger is maxing out at 0.95, simply set your in-game ‘Max Threshold’ to 0.90. You’ll suddenly find yourself winning more gunfights because your gun is actually firing when you think it is.
D-Pad Malfunctions
Directional Confusion
D-pad issues are particularly problematic for fighting games and retro gaming:
Wrong Direction Registration
When pressing UP registers as UP+RIGHT, indicating:
- Misaligned rubber membrane
- Worn pivot point
- PCB contact issues
Multiple Simultaneous Inputs
Pressing one direction triggers multiple directions:
- Short circuits between contacts
- Conductive pad degradation
- Assembly problems
Uneven Pressure Requirements
A USB controller tester helps identify when different D-pad directions require varying pressure:
- One direction needs hard press
- Opposite directions have different sensitivities
- Diagonal inputs are inconsistent
Connectivity and Power Problems
Wireless Connection Issues
Bluetooth gamepad testing reveals:
Intermittent Disconnections
- Battery problems
- Antenna damage
- Interference from other devices
Input Lag Variations
Online controller calibration tools measure:
- Consistent high latency (distance/interference)
- Variable latency (failing wireless module)
- Packet loss patterns
USB Connection Faults
Wired controller diagnostics show:
Cable-Related Issues
- Intermittent connection (worn cable)
- No detection (broken data lines)
- Power but no data (specific wire damage)
Port Problems
- Loose USB port on controller
- Bent pins
- Corrosion or debris
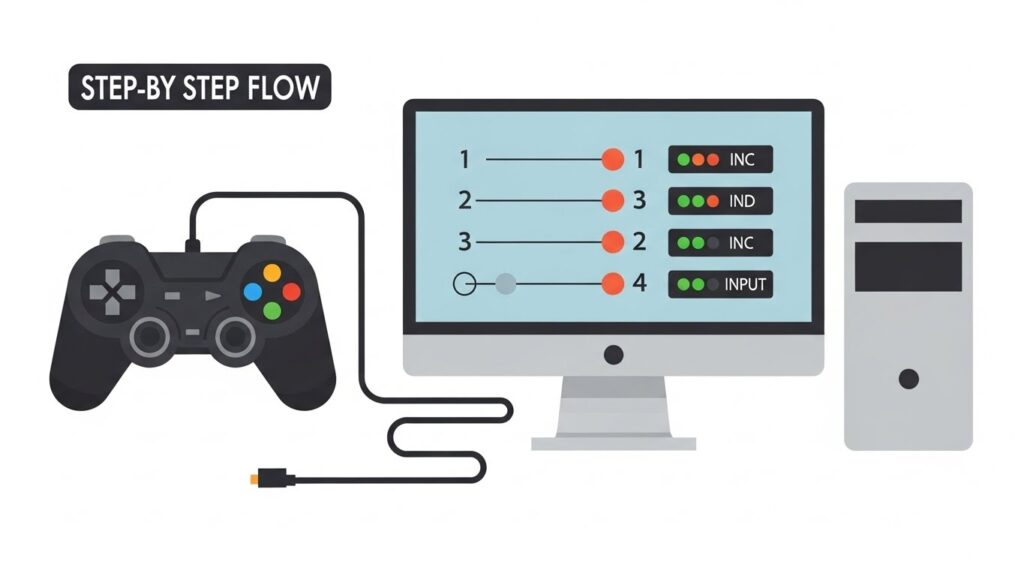
How to Test Your Controller Step-by-Step
Preparation Phase
- Clean your controller externally to ensure accurate testing
- Charge fully (for wireless controllers)
- Close other applications that might interfere
- Have both USB and wireless options ready
Testing Process
Step 1: Initial Connection Test
Connect your controller and verify basic detection using an HTML5 gamepad tester online.
Step 2: Button Mapping Verification
Press each button individually and confirm:
- Correct button registers
- No other buttons activate
- Response is immediate
Step 3: Analog Stick Evaluation
- Center test: Don’t touch sticks, check for drift
- Full range: Move sticks to all extremes
- Circular motion: Test smooth transitions
- Release test: Verify return to center
Step 4: Trigger Analysis
- Slowly press each trigger from 0-100%
- Check for smooth value progression
- Test rapid presses
- Verify full release
Step 5: D-Pad Assessment
- Press each direction individually
- Test diagonal combinations
- Check for unintended inputs
Step 6: Vibration Testing (if supported)
- Test both motors separately
- Verify different intensity levels
- Check for unusual noises
Recording Your Results
Document findings systematically:
| Component | Test Result | Issues Found | Severity (1-10) |
|---|---|---|---|
| Left Stick | Drift detected | X-axis +0.15 at rest | 6 |
| A Button | Intermittent | Works 70% of time | 8 |
| Right Trigger | Reduced range | Max value 85% | 5 |
Understanding Test Results
Interpreting the Data
Normal vs Abnormal Values
Analog Sticks:
- Normal: -1.00 to +1.00 range, center at 0.00 (±0.05)
- Concerning: Center drift >0.10, incomplete range
- Critical: Drift >0.20, stuck positions, erratic jumps
Triggers:
- Normal: 0-255 full range, smooth progression
- Warning: Max value <240, jumpy transitions
- Failed: Stuck values, no response, extreme jumpiness
Patterns That Indicate Specific Problems
Gradual Degradation Pattern
Values slowly worsen over multiple tests = normal wear
Sudden Failure Pattern
Immediate complete failure = physical damage or liquid exposure
Intermittent Pattern
Random failures = loose connections or environmental factors
When to Repair vs Replace
Repairable Issues
Controllers worth fixing typically have:
Simple Mechanical Problems
- Stick drift under 0.20
- Sticky buttons (cleaning needed)
- Worn rubber membranes
- Loose cables
Cost-Effective Repairs
- Common parts available (analog stick modules: $5-10)
- DIY-friendly design
- YouTube tutorials available
- Tools readily accessible
Replacement Indicators
Consider replacement when facing:
Multiple Simultaneous Failures
- 3+ major components affected
- Mainboard damage suspected
- Water/liquid damage extensive
Economic Factors
- Repair cost >60% of new controller
- Discontinued model with no parts
- Warranty still valid (use it!)
Professional Repair Services
Sometimes professional help makes sense:
- Valuable limited edition controllers
- Complex soldeirng required
- Warranty-covered repairs
- Lack of technical confidence
Want to See More Gamepadscan’s Guide [CLICK THIS]
FAQs
Q1: Can online gamepad testers detect all hardware problems?
A: Online testers can detect most input-related hardware issues like drift, dead buttons, and connectivity problems. However, they cannot identify internal physical damage, battery issues in wireless controllers, or problems that don’t affect input registration directly.
Q2: How often should I test my gaming controller?
A: Test your controller monthly if you’re a heavy gamer (20+ hours/week) or whenever you notice performance issues. Casual gamers should test every 3-4 months or when problems arise. Regular testing helps catch issues early before they become severe.
Q3: Why does my controller work in games but fail certain tester checks?
A: Games often have built-in dead zone compensation and input filtering that mask minor hardware issues. Testers show raw, unfiltered data, revealing problems that games might automatically compensate for. This is why a controller with 0.15 drift might seem fine in some games but problematic in others.
Q4: Can controller testers fix problems or just detect them?
A: Testers are diagnostic tools that identify problems—they don’t fix hardware issues. However, some testers include calibration features that can help with software-related problems. Physical hardware faults require manual repair or replacement.
Q5: Is controller drift always a hardware problem?
A: While drift is usually hardware-related (worn potentiometers, debris, or damaged springs), sometimes it’s software-based. Driver issues, incorrect calibration, or game-specific settings can mimic hardware drift. Always test with multiple methods before concluding it’s hardware failure.
Conclusion
Understanding your gamepad’s hardware faults through proper testing can save you money and frustration. Whether you’re dealing with annoying stick drift, unresponsive buttons, or mysterious connectivity issues, a systematic testing approach reveals the truth behind your controller’s problems.
Remember these key takeaways:
- Test regularly to catch problems early
- Document your findings for warranty claims
- Use multiple testing methods for accuracy
- Consider repair costs versus replacement
- Clean and maintain controllers to prevent issues
Modern gamepad testers, especially free online HTML5 versions, make controller diagnostics accessible to everyone. You don’t need expensive equipment or technical expertise—just a browser and a few minutes of your time.
Before tossing that “broken” controller, run it through a comprehensive test. You might discover a simple fix that extends its life by years, or gain the confidence to attempt a DIY repair. Either way, you’ll make an informed decision based on actual data, not frustration.
Start testing today, and take control of your controller’s health. Your gaming experience—and wallet—will thank you.
External Authority Sources: