
Introduction-How to Test Your Game-pad Online
A reliable and responsive gamepad is every gamer’s best friend. I know that feeling when a tiny drift on the analog stick ruins a perfect combo—it’s frustrating and oddly personal. This small peripheral isn’t just hardware; it’s your link to the virtual world, to the thrill of exploring, fighting, and winning. A smooth operation means no sticky buttons, no unresponsive triggers, and absolutely no lag. Using an online tester or a downloadable tool helps identify problems before they spoil the fun. It’s quick, effective, and makes every session feel seamlessly connected again.
From my own experience, regular checking can save hours of troubleshooting later. Hardware wears over time; that’s normal. A good diagnostic tester or utility lets you detect problems early—drift, bad connectivity, even vibration issues. I’ve found that once you start testing, you become oddly proud of how precise and responsive your controller feels afterward. It’s like giving your gamepad a quick tune‑up before the next session, keeping your performance sharp and your experience truly enjoyable..
ALSO READ: Best Free Game-pad Tester Tools (2025 Comparison & Reviews)
Table of Contents
Why Test Your Gamepad?
Testing isn’t just for when something stops working—it’s for peace of mind. I’ve learned the hard way that even a tiny delay between your pressing a button and what happens on screen can throw off your rhythm. A quick test helps identify responsiveness issues like lag, drift, or unresponsive triggers before they become annoying mid‑game. It’s also a smart pre‑purchase habit when trying a used controller—you can verify movement, vibrations, and buttons all respond accurately. Even older or generic devices benefit from a simple calibration or fine‑tuning to keep their performance consistent. A quick tester check takes a minute but saves hours of troubleshooting later.
I often diagnose drift by watching the cursor or analog stick to see if it moves without input—those small unwanted shifts make all the difference. Ensuring smooth configuration, confirming proper reaction directions, and watching the motor rumble in sync with your actions feels oddly satisfying. Some situations require adjusting sensitivity, while others just need a confirmation that everything is functioning as expected. A reliable utility or setup is crucial for responsive play. Whether you’re checking hardware accuracy or simply avoiding unnecessary stress, these small routine tests make your gaming feel sharper, smoother, and much more in control.

Types of Gamepad Testers
Online Gamepad Testers:
When I first tried online testers, I was impressed by their ease of use—you can simply connect your controller, open a modern browser, and begin testing within seconds. No installation or downloads needed, just direct access through HTML5 API that allows your computer to read input instantly. These testers work by detecting every button press, analog movement, and trigger pull, showing real‑time feedback through a web interface. It’s quick, accurate, and surprisingly fun to watch your hardware respond so reliably. For quick diagnostics, minor calibration, or fast performance checking, they’re among the most convenient tools available online today.
Pros: Online testers are free, accessible, and virtually universal across modern browsers. Their speed, accuracy, and diagnostic simplicity make them perfect for quick driver‑level checks. I often recommend them to players who want to test new controllers or confirm that input response is accurate before a match.
Cons: They do have limitations. Certain proprietary controllers require special drivers or have restricted features that browsers can’t reach. Extensions, performance differences, or API restrictions can also slightly affect precision. Still, for most categories of gamers, their advantages far outweigh these minor disadvantages, making online testers a reliable, convenient, and diagnostic essential.
Software-Based Gamepad Testers (e.g., Windows built-in, third-party utilities):
Software‑based gamepad testers go a bit deeper than their online counterparts, offering detailed diagnostics and precise control over testing and calibration. They work by giving your system access to driver‑specific feedback and detection, allowing for more accurate troubleshooting of issues such as drift, button input errors, or stick misalignment. I often rely on Windows built‑in utilities for quick testing—it’s surprisingly convenient once you open the tool from the operating menu. For deeper checks, third‑party software offers a broader range of capabilities and finer calibration, helping you identify even subtle feedback inconsistencies or functionality problems.
How They Work: These utilities usually require a download or simple installation. Once opened, you can connect your controller to start a test that displays every input, movement, and trigger response. Some advanced tools even show detailed data—like drivers, stick positions, and vibration behavior—providing an accurate picture of performance.
Pros: Software‑based testers are ideal for those who want deeper, more detailed diagnostics and precise calibration. They often support a wider array of controllers, offer feedback customization, and give full access to driver‑level settings.
Cons: They require installation, sometimes administrative privileges, and can feel less convenient than online options. A few third‑party versions may be paid, but the extra information and troubleshooting depth make them worth it for players serious about functionality and performance.
.
How to Use an Online Gamepad Tester (Step-by-Step)
Step 1: Connect and Set Up
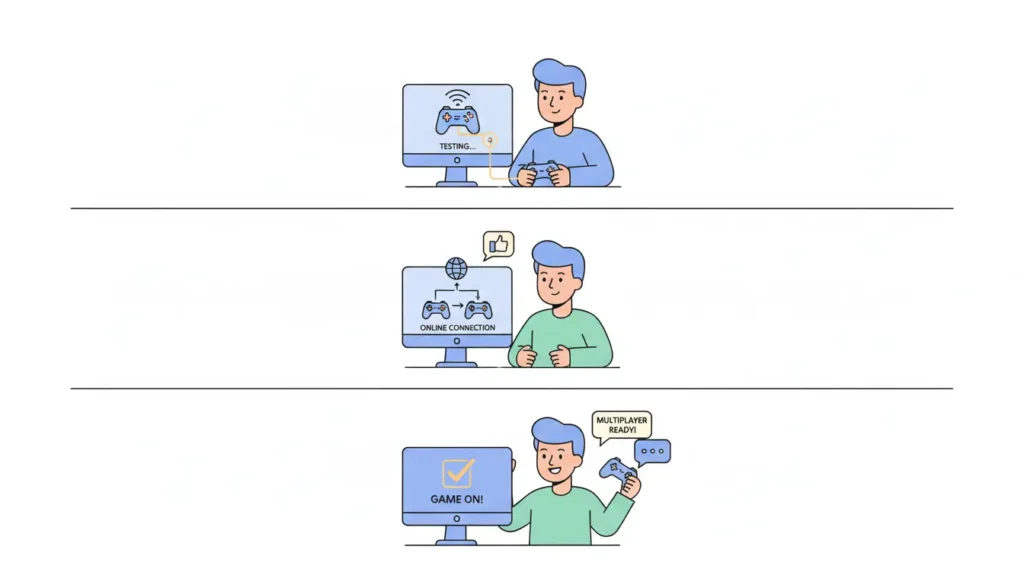
Using an online tester is refreshingly intuitive once you try it. Start by connecting your controller to the PC, either through a USB cable for plug‑and‑play simplicity or a wireless Bluetooth dongle if you prefer freedom of movement. Make sure the device is paired, reliable, and detected under your system’s configuration settings. Then open a standards‑compliant webpage that leverages the HTML5 API, which allows the browser to automatically access your hardware. Within seconds, your controller’s layout appears as a clean visual representation—complete with buttons, sticks, axes, and triggers ready to respond to your touch. The process feels smooth, accurate, and completely plug‑and‑play, as the online tester instantly begins its diagnostic routine.
Step 2: Interact and Observe
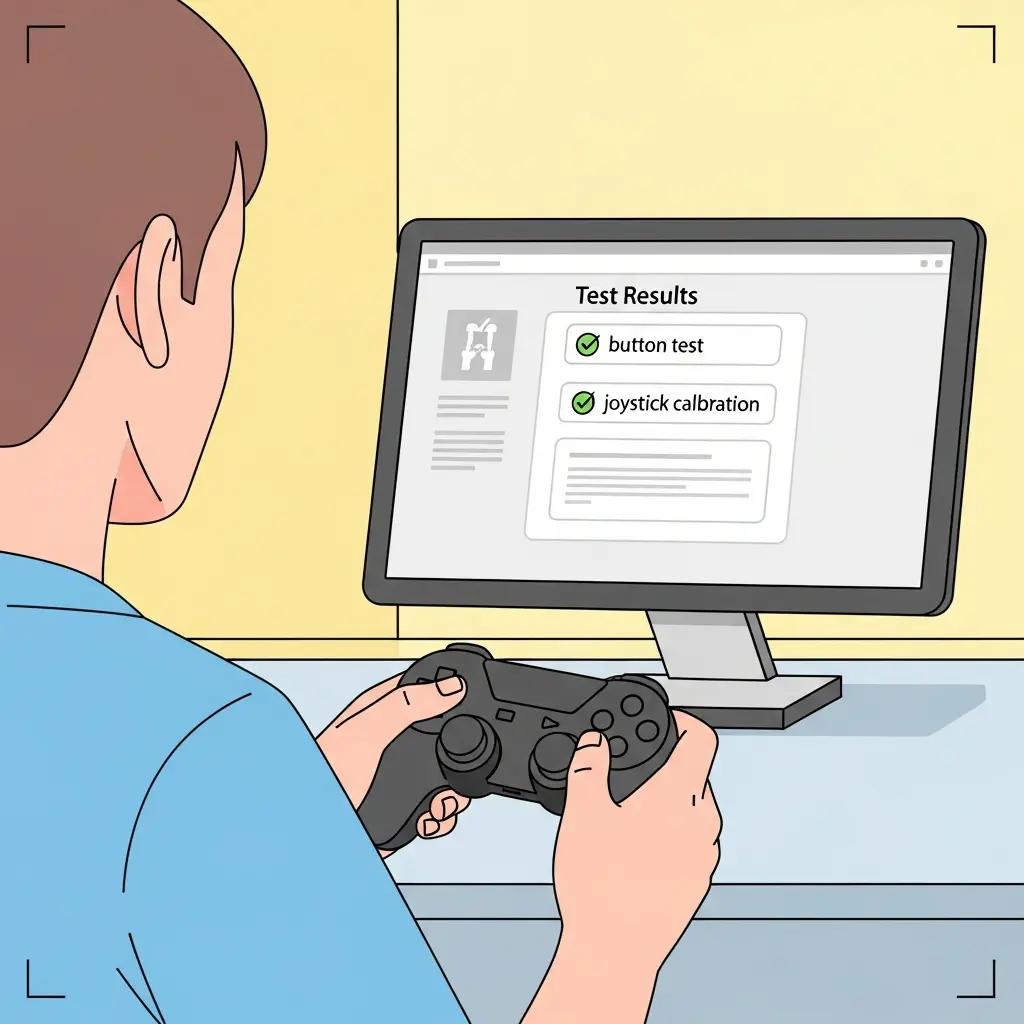
Once the test begins, each press, motion, or trigger pull sends a signal that’s expressed through visual feedback on the web interface. You’ll notice lights, animations, or color cues highlighting individual buttons, while bars, crosshairs, and ranges move to match your actions. This detailed feedback helps analyze sensitivity, motion, and centering—ideal for catching issues like stick drift, unbalanced pressure, or unreliable trigger response. I often use this to check my analog sticks and triggers, ensuring they’re returning smoothly to a neutral point. You can also view raw data, numerical values, and progressive changes under the axis sections, showing exactly how your controller interprets movement. It’s fun in a nerdy way—watching your device react in real time makes you feel like a mini technician, confirming that every motion is calibrated, every button is responsive, and your hardware is perfectly tuned for play.
Testing Specific Gamepad Components
- Analog Sticks
- When testing analog sticks, patience pays off. Slowly move each stick through circular motions and watch how the on‑screen indicator reacts in your tester. If it reaches the full range smoothly, your stick is in good shape. I usually check for subtle stick drift by releasing it and observing whether it returns cleanly to the center or neutral position—any slight creeping means it needs calibration. You can also look at raw input values to assess dead zones, which tell you how far you need to move the stick before it registers. Overly large dead zones can make controls feel sluggish, while smaller ones can create twitchy reactions. Don’t forget to click the L3/R3 buttons if your controller has them; they should register just as distinctly as a face button.
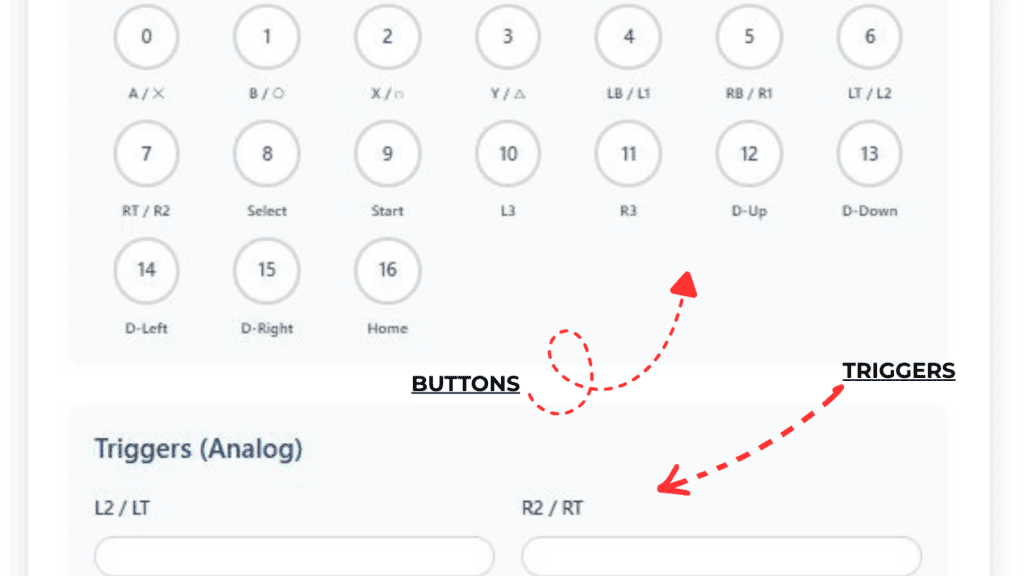
- Buttons (Face Buttons, Shoulder Buttons, D-pad, Special Buttons)
- Testing buttons is all about rhythm and consistency. Press each face button—A, B, X, Y (or Cross, Circle, Square, Triangle)—and then test the shoulder pairs (LB/RB or L1/R1) and D-pad directions (Up, Down, Left, Right). On the tester, every press should trigger an immediate visual response. I usually pay attention to buttons that feel sticky, need extra force, or trigger double inputs. That’s often a sign of wear or internal dust. Test your Start, Select, Home, and Share buttons too—they’re small but surprisingly important for menus and screenshot timing. You’ll feel the difference between a clean click and one that requires too much pressure, and seeing that difference reflected accurately on‑screen helps you catch subtle faults before they become game‑breaking.
- Triggers, Vibration, and Connectivity
- Your triggers deserve their own careful pass. Many modern gamepads have analog triggers (LT/RT or L2/R2), which should show a progressive bar or percentage value on the tester as you squeeze them. Digital triggers, by contrast, simply toggle on and off. If one feels stiff or shows uneven movement, that’s a sign of calibration or hardware trouble. Some testers also let you check vibration/rumble motors—when activated, you should feel a clear and smooth feedback pulse from the controller. It’s oddly satisfying, like confirming your controller has a heartbeat. Finally, don’t overlook wireless connectivity. Move within normal range and see if signals drop or inputs lag; this helps spot issues with your Bluetooth or dongle connection. These small checks on connectivity, motion, and tactile feel go a long way in keeping every gaming session responsive and worry‑free.
Using Windows Built-in Game Controller Settings (joy.cpl)
Accessing and Launching the Tool
If you’ve never tried Windows’ classic joy.cpl utility, you’re missing a reliable built‑in way to test and calibrate your controller. I often recommend it to users who want a quick, accurate check without any third‑party software. Simply press Win + R, type joy.cpl, and hit Enter. This opens the Game Controllers window, where your connected devices are listed. From there, select your controller, confirm it’s detected, and click Properties to access the detailed testing interface. It’s a tiny nostalgic dialog that’s been part of Windows since the legacy gaming days—simple, predictable, and still incredibly useful.
Testing and Calibration
Inside the interface, you’ll see indicators, sliders, and tabs representing buttons, sticks, and triggers. Try pressing every input—each registered press lights up a corresponding indicator. Move your analog stick around and watch the crosshair glide across the screen, confirming rotation and axis movement. When calibration is needed, the Settings tab will walk you through a careful process. I always tell people to follow the on‑screen prompts slowly; rushing it can lead to improper calibration and off‑center inputs. It’s a routine that gives you deep insight into how your controller actually responds to your motions.
Recalibrating and Troubleshooting
For older or unresponsive controllers, the calibration option provides an easy fix. The utility helps ensure your sticks are centered and your triggers register along the full range. Some modern controllers, like PlayStation or Xbox models, come pre‑calibrated and may not need much tweaking, but others benefit enormously from manual adjustment. If something feels off after calibration, you can recalibrate or avoid further changes by choosing the pre‑set state again. I’ve used these routines countless times to verify button accuracy, troubleshoot stubborn inputs, and keep my controllers functioning like new. Everything about joy.cpl—from the dialog layout to its precise indicators—makes it a surprisingly modern‑reliable tool in a very classic shell.
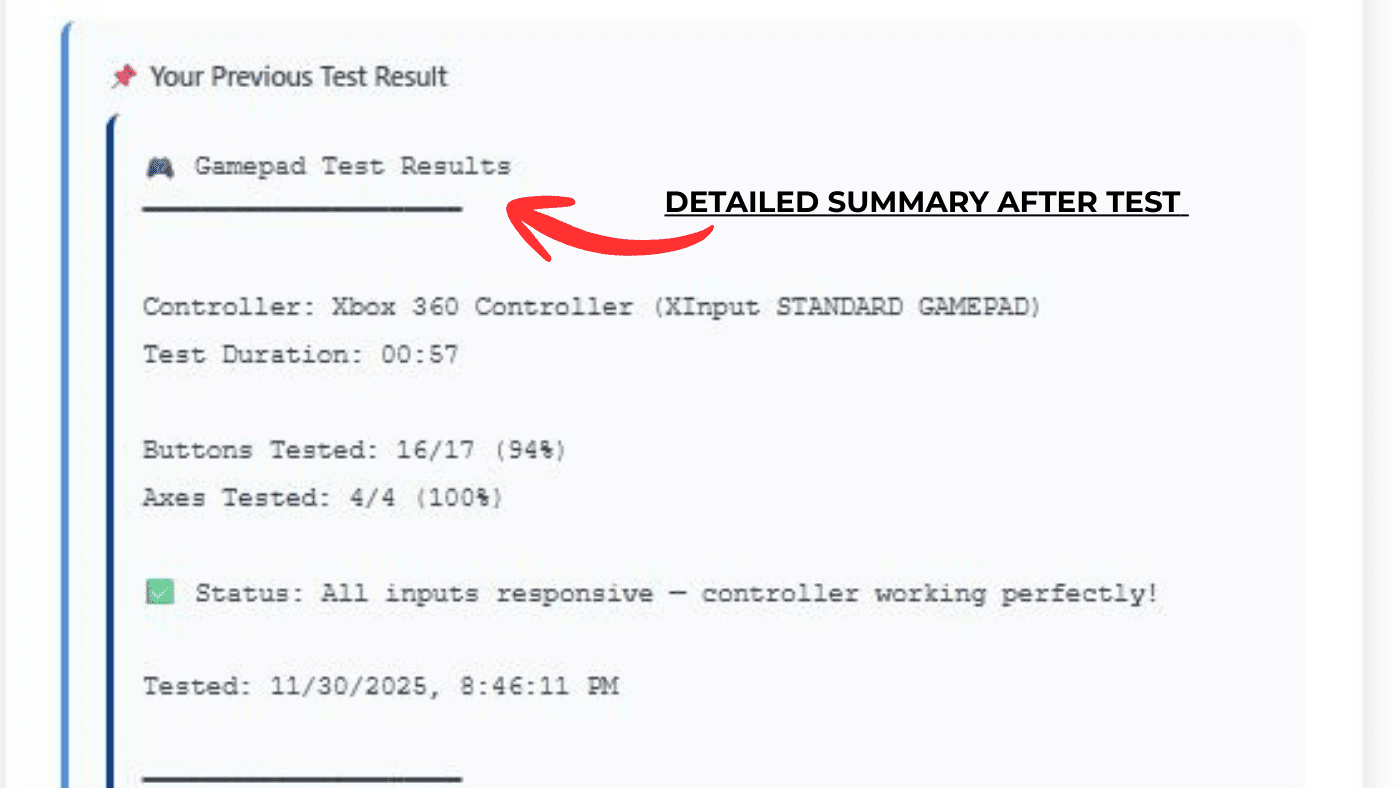
Interpreting Test Results: Common Problems and What They Mean
Stick Drift and Alignment Issues
When reviewing test results, one of the first things to check is stick drift. This happens when the analog stick shows movement even while it’s centered and untouched. I’ve seen this in older controllers where wear or a worn‑out potentiometer slightly warps input accuracy. Your tester will often highlight the fluctuating values, allowing you to identify how far the stick drifts from its neutral axis. If it never quite reaches or stays at zero, that’s your warning sign. Sometimes dirt, debris, or internal buildup around the mechanism can cause obstructed motion, while other times, improper calibration or software interference plays the villain. A quick diagnosing step—gently calibrate and monitor the results—can help accurately reveal whether the problem is internal, mechanical, or purely configuration-based.
Buttons, Triggers, and Response Behavior
Next up, analyze your buttons and triggers. On a good run, every press should register cleanly, with no lag or unresponsive feedback. If a button fails to highlight or shows inconsistent results, it might point to a conductive membrane fault, dirty contacts, or a small buildup of debris under the pad. I once had a trigger that felt normal but barely registered—the potentiometer inside was damaged, skewing the range of motion. For analog triggers, a missing percentage or jerky progression in the bar graph signals a bad connection or partial wear. Some modern controllers even let you view fine‑tuning data, which helps verify whether input changes are smooth across the full range. If not, re‑testing with different drivers or mapping configurations may fix minor inaccuracies.
Axis Mapping, Connection, and Calibration
Improper mapping or configuration can sometimes indicate issues that aren’t hardware at all. For instance, older devices or non‑standardized inputs may send data through the wrong X‑axis or Y‑axis, making your controller respond unpredictably. I’ve seen a trigger control the camera instead of aiming—it’s strangely amusing until the problem persists mid‑match. These mismatches often come from custom software, incorrect drivers, or XInput vs. DirectInput conflicts. If your tester shows an accurate range but your game behaves oddly, double‑check the mapping setup in your calibration utility. Always make sure your controllers are properly centered, the inputs respond within standardized boundaries, and that your hardware isn’t faulty or improperly calibrated. Keeping the calibration, cleanliness, and connection in check ensures your controller remains responsive, reliable, and well within its design mechanism.
Basic Gamepad Troubleshooting Based on Test Results
Cleaning and External Maintenance
If your test shows drift, sticky buttons, or poor input response, start with a simple cleaning routine. I’ve rescued more than one controller with nothing more than a microfiber cloth, a puff of compressed air, and a bit of isopropyl alcohol. Gently wipe the external surface, focusing on seams and joints where dust, dirt, or debris tends to accumulate. For deeper buildup, carefully blow air around buttons and sticks while tilting the device so residue falls away. Controllers that feel sticky after long use often have natural skin oil buildup—it’s surprisingly common even on newer models. Keeping your gear clean isn’t cosmetic; it’s vital troubleshooting that prevents persistent malfunctions and extends hardware life.
Connection and Re-Pairing Fixes
Sometimes your controller works fine, but your system can’t seem to recognize it—or it disconnects mid‑game. That often means a connectivity issue, not hardware damage. In such cases, try reconnecting through USB, or if it’s wireless, re‑pairing via Bluetooth. I’ve had my Xbox controller desync mid‑match—it was nothing a quick re‑pair couldn’t fix. For Windows, open Device Manager, remove the device, then let the system redetect it automatically. External interference can also cause brief intermittent failures, especially in crowded wireless environments, so testing in a quiet signal zone helps. A firm reconnection often resolves more problems than most people expect.
Calibration and Input Diagnostics
If your analog stick remains off‑center or your triggers don’t respond accurately, a calibration reset might be necessary. Windows provides a simple calibration utility under joy.cpl, or you can use specialized utilities that offer more advanced diagnostics. I always suggest keeping movements slow and deliberate during calibrations—rushing can misalign range detection. For older or generic controllers, recalibration often restores stability to input readings and smooths out drift that comes from light wear. If the issue remains even after you calibrate, it may indicate physical mechanism wear, in which case internal repair or professional diagnosing becomes the next logical step.
Firmware, Software, and System Updates
Every so often, firmware updates silently fix odd behaviors. Manufacturers like to hide helpful bug corrections in update notes, so checking the official site periodically is worthwhile. Many controllers, including the Xbox and other wireless models, receive firmware upgrades that improve connectivity or correct drift and input mapping confusion. Similarly, don’t ignore Windows or gaming software updates—they can solve driver incompatibilities that might cause reinstallation nightmares later. If your device feels inconsistent across programs, that’s often a software sync issue, not failing hardware.
Internal Cleaning and Repair Attempts
When all else fails, careful disassembly is sometimes the only way forward—but proceed with caution. I’ve had to disassemble older controllers where internal contacts had become dusty or slightly corroded. Use isopropyl alcohol (90% or higher) and a fine swab for cleaning, ensuring no liquid seeps near the circuitry or contacts. If you aren’t comfortable disassembling electronics, consult guides from the manufacturer or seek professional repair. Always remember: small connections can be fragile, and over‑tightening screws after reassembly may distort the centered alignment of buttons or triggers. When done carefully, these procedures—paired with timely updates and cleaning—can bring even a weary controller back to smooth, responsive life.
Conclusion
After spending hours testing, diagnosing, and tweaking, every gamer begins to understand how small details create big differences in performance. A trusty controller, whether checked through an online tester or a software‑based utility, becomes more than a device—it’s part of your rhythm. I’ve learned that those occasional testing routines aren’t chores at all; they’re empowering habits that fix small issues before they become frustrating problems. Watching a trigger respond smoothly or a stick return accurately to center gives that quiet satisfaction similar to tuning an instrument. The process of diagnosing, interpreting, and understanding how each input behaves provides invaluable insight into your controller’s health and your own responsiveness in‑game.
For anyone serious about their gaming experience, testing tools—both online and software‑based—are helpful, accurate, and genuinely empowering. They give you quick, detailed feedback, help detect minor issues, and even save future sessions from unwanted frustration. Over time, you become fluent in reading your controller’s language—how it responds, when it feels off, and how troubleshooting can improve its performance. That kind of familiarity isn’t just beneficial; it’s a form of gaming self‑care. Whether it’s a routine check between sessions or a deep dive into diagnostics, this understanding turns every gamer into their own optimizer, keeping both controller and player tuned for the next critical moment.
More Guides:
- How Gamepad Tester Tool Works: A Complete Technical Breakdown(2026)
- How to Check if Your Joystick Is Drifting Using an Online Tester(2026)
- How to Calibrate Your Gamepad Without Any Software:The Ultimate 2026 Guide